ZOOM Self-Recording Instructions
Click “New Meeting.” This will open a new window and start your webcam video.


To record your computer screen, click the “Share Screen” icon in the middle of the Zoom window or in the menu at the bottom of the screen. Select your main screen or any window to record and press the “Share Screen” button.

If you are recording a video, be sure to check the "Optimize for full screen video" boxes at the bottom of the record window.

End Your Recording
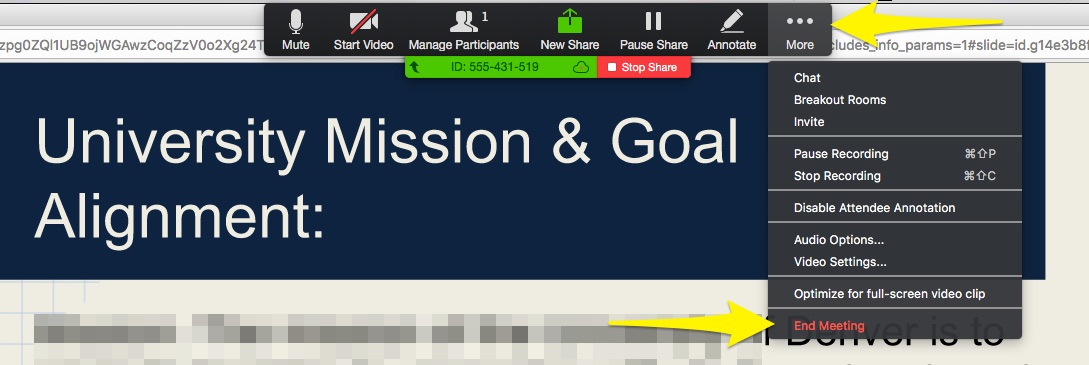
To end the recording, press the “More” menu option and select “End Meeting“. Press the “End Meeting for All” button. This will end your meeting. You will see a notification as Zoom processes and saves the video to your computer. The folder where it is saved should open automatically.

From here you can upload the video to OneDrive or Stream, then share the link to your class page. Or directly share the Zoom cloud link and password that will appear soon in your email inbox.